
iPhone Screenshots


Description
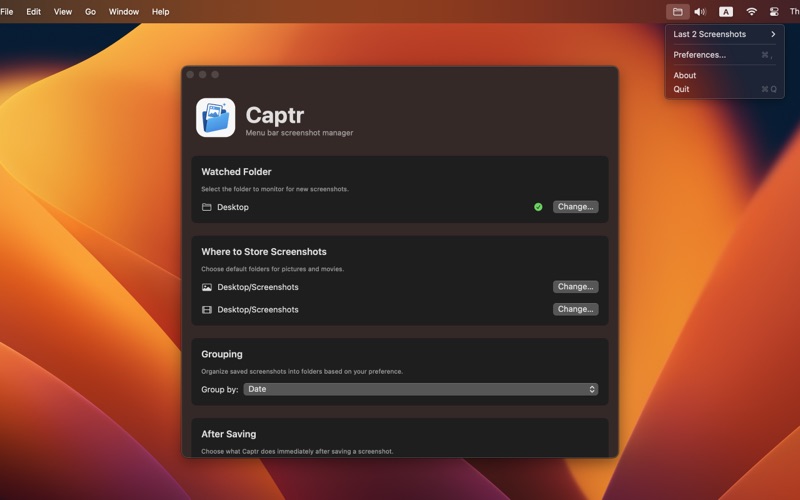
Captr is your effortless, always-on macOS menu bar assistant for managing screenshots and screen recordings. It watches your chosen folders in real time and automatically files each new capture where you want it—no more hunting through Downloads or Desktop clutter. Tap the Captr icon to preview up to 20 of your most recent snaps, jump straight to any file in Finder, or adjust your destination folders on the fly.
_________________________________
Key Features
• Auto-Sort on Capture
Instantly move every new screenshot (⌘⇧ 3 or ⌘⇧ 4) and recording (⌘⇧ 5) into the folder you specify - keeping your Desktop tidy without lifting a finger.
• Flexible Grouping
Organize your captures by application, by date (year and month), or by both—tailor Captr to your workflow.
• Auto-Recovery of Folders
Accidentally delete a destination folder? Captr will automatically recreate it (no need to reselect).
• Recent Snapshots Submenu
One click reveals your five latest captures (up to 20, if you prefer), each with a live thumbnail. Open any of them directly from the menu.
• Enhanced Delete Confirmation
When you delete a snapshot, you’ll see its thumbnail in a frontmost alert - so you always know exactly what you’re removing.
• Quick "Show in Finder"
Need to share, edit, or upload? Captr will open the folder and highlight your selected capture for you.
• Custom Destinations
Set separate folders for screenshots and recordings.
• Lightweight & Invisible
Runs as an accessory app (no Dock icon), only appears in your menu bar. Start at login so it’s always ready when you hit ⌘⇧ 3 or ⌘⇧ 4.
• Performance-Focused
Built with DispatchSource APIs to watch folders efficiently, even under heavy capture loads.
• Configurable Feedback
Toggle "Open in Finder after saving" or "View file after saving" to your preference.
_________________________________
Why Captr?
• Stop Losing Captures
Never miss a screenshot by accidentally saving to the wrong place.
• Boost Productivity
Spend less time organizing files and more time creating.
• Stay Focused
No more context-switching to Finder or Terminal to find that one screenshot.
_________________________________
Getting Started
1. On first launch, you’ll be prompted to choose the folder where your screenshots are currently saved (you can always remap it later via Change watched screenshots folder…).
2. Click the Captr icon in the menu bar (it may be hidden at the far right among your other icons).
3. Select your image destination by clicking Change screenshots folder…, and your video destination with Change recordings folder…. While the app is running, all new captures will be moved into those folders.
4. (Optional) Toggle Open in Finder after saving or View file after saving to your preference.
5. (Optional) Choose View Recent Screenshots… to see up to your latest 20 captures (provided they remain in those folders and haven’t been renamed).
6. Delete screenshots right from the Recent Snapshots menu, choosing whether to move them to Trash or delete permanently.
7. Capture as usual—Captr handles the rest.
_________________________________
Support & Feedback
Captr is under active development. If you have a feature request, encounter an issue, want to assist with localization, or just want to say hello, please reach out at [email protected].
Enjoy a cleaner, more organized workflow—one capture at a time.